The B1 was the first complete prototype of the XO-4 Touch. The B1 bring up happened in the middle of September, 2012. XO-4 B1 units all have prototype multi-touch touchscreens using touchscreen technology from Neonode.
Identification
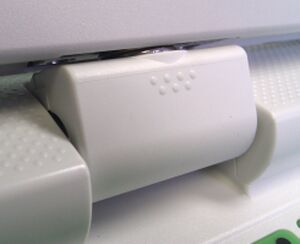
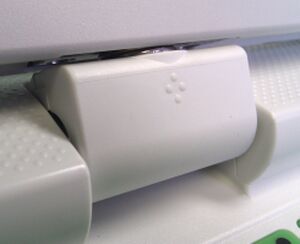
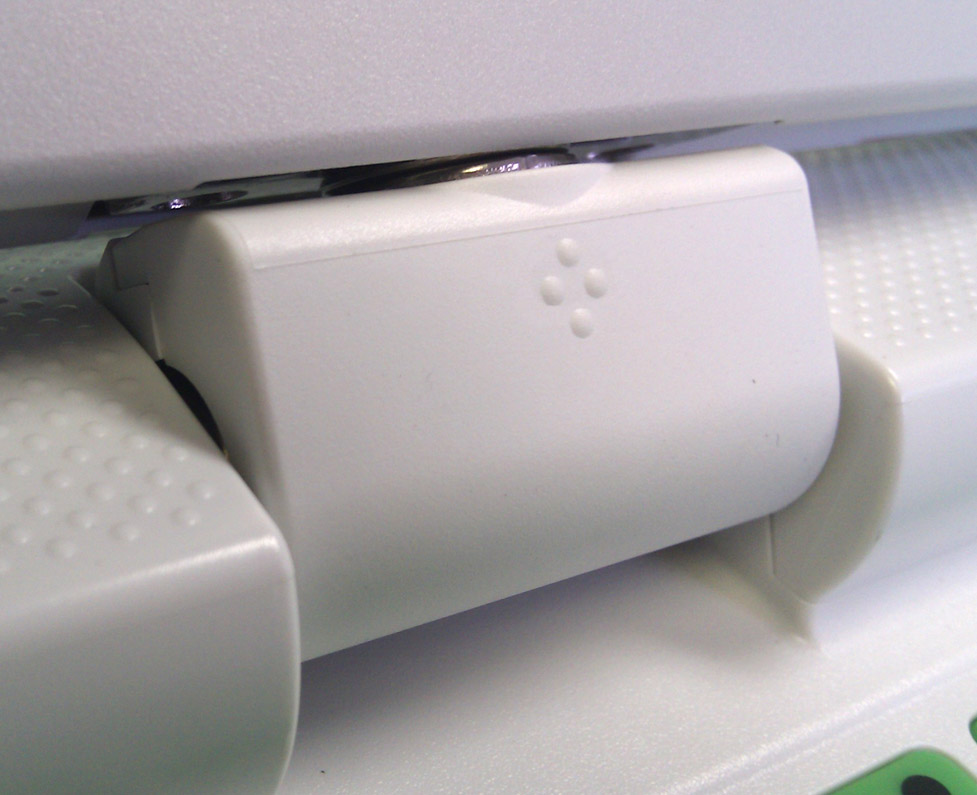
Seven bumps (arranged in two rows) on the Hinge Cover, identical to the XO-1.75XO-4 B1 Hinge Cover. This will change for production. Production XO-4 Hinge Cover
The display has a bezel which doesn't have any texture (it is slick), and it is 1mm deeper than earlier XO laptops.
The touchscreen light guide is clear. In production units, this will be tinted and appear deep purple/black.
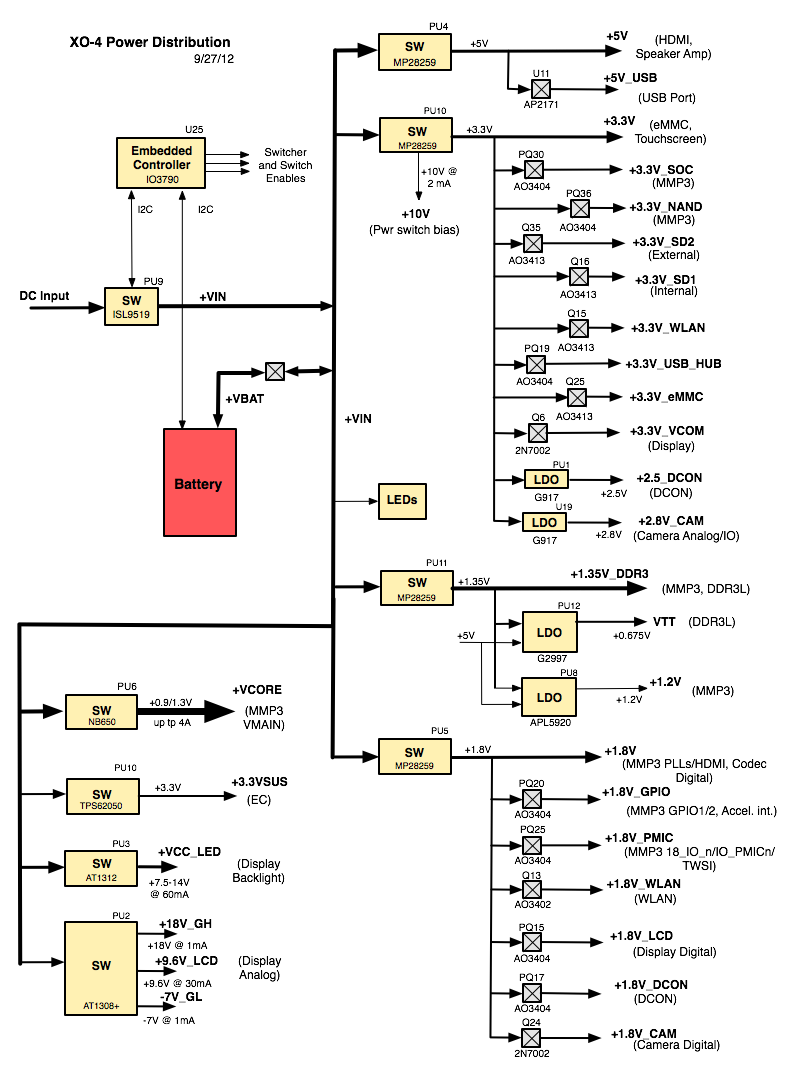
Rev. C motherboard
B1 laptops were produced with a variety of keyboards. They are identified in the battery compartment as SKUs 291, 292, 293, or 294.
Photographs:
Actually an A2 motherboard. Changes are minor, however. To be updated soon
The Q7Bxx series of Open Firmware cannot be used with XO-4 A2 motherboards. Starting with XO-4 B1, the size of OFW is 2MBytes.
This will not work on an XO-1, XO-1.5, or XO-1.75. As with XO-1.75, Open Firmware and the EC firmware are separate --- Open Firmware contains a recent version of the EC firmware and will automatically update an older version given two sources of power, but a more recent version may actually be programmed into the EC.
It is strongly recommended that you have two sources of power (a charged battery and an external power source) when you upgrade your EC or Open Firmware. Failure to do so may require the use of an SPI programmer to recover your laptop.
Upgrading the EC code
Using Open Firmware and WiFi
requires Q7B01 or later
ok wifi name
ok flash-ec http:\\dev.laptop.org\pub\ec\cl4-7_0_2_01.img
Reading http:\\dev.laptop.org\pub\ec\cl4-7_0_2_01.img
Scan for: name found
Associate with: name
DHCP got 10.0.0.170
EC firmware verison: XO-EC 7 0.2.01
Erasing ...

Writing ...
fff0
Verifying ...
fff0
Board powers down at this point due to EC restart. Power up manually.
We recommend that B1 motherboards use a heat spreader.
Known Tooling Problems
These are some of the known tooling problems, all of which will be fixed:
The power button, and the game buttons above it are not properly heat-staked, causing both problems with assembly and also a misalignment once assembled.
The bezel doesn't have its final texture
The hinge cover doesn't have it's final ID
Disassembly
When disassembling the XO-4 B1, please be careful with the flex cable connecting the touchscreen to the motherboard. In particular, the connector used to connect the flex cable to the IR PCB on the bezel is relatively fragile. Instead of disconnecting the flex cable from the IR PCB, we recommend laying the bezel/touchscreen assembly on the keyboard, removing the display, then disconnecting the flex cable from the motherboard. This will be improved in the C1 version.
When reassembling the laptop, please be aware that proper operation of the touchscreen requires that it be flat. Don't expect it to work well if the bezel isn't properly attached to the laptop using the four screws underneath the bezel.
Display Screws
The display is attached to the mainframe using screws which are shorter than the ones used on previous XOs. If you use one of the "normal" length, you will damage the motherboard. This is being fixed.
Speakers
We are looking at several problems with the speakers:
Connectors
Be very careful with the speaker connectors, it is easy to pull the wires out of the plastic shell. This is being studied.
Rattles
The speakers are not properly attached, and are prone to rattle, especially after shipping. If yours rattles, we recommend using a heavy duty epoxy to glue it down. This will be fixed.
White Screen at Boot
After shipping from the factory, the laptop will refuse to boot. This presents a white screen to the user, followed eventually by the "alien invasion screen" showing the number 52. Simply reboot the laptop and it should never happen again. This was tracked as <trac>12135</trac>, and has been fixed in versions of OFW later than Q7B02.
Second serial port
As with XO-1.75, there is a second serial port provided for deep debugging of kernel issues. Unlike XO-1.75, this serial port is not populated by default. If you need to use this serial port, you will have to populate CN23, and make sure that Q38, Q44, R408, R373, and R98 are also populated. Like the main serial port, this one operates at +3.3V (using a voltage translator on the motherboard, as the actual SoC pins only tolerate +1.8V).
Documentation
Supporting documentation for these laptops (all in PDF):


